How to Diagnose and Install Bushings and Control Arms in Your Mercedes
Giancarlo Perlas January 4, 2022
Photo Source: Pixabay
Control arms and bushings lower the vibration between the wheels and the frame of your beloved Mercedes cars. They also ensure the control arm alignment. Dysfunctional bushings cause driving discomfort, increase vibration, and lead to other potentially dangerous issues. Once bushings begin to wear, you can expect vibrating steering wheels, banging or clunking sounds, steering wander, uneven tire wear, and uneven braking. Lower control arm bushing noises may result from the worn bushing, loose bushing, driving on rough terrain, and hard acceleration.
If the control arm and bushings are loose, you can tighten them. If they’re worn out, you should replace them. Ignoring knocking or clunking noises isn’t a good idea because they may lead to steering malfunction and make it hard for you to control your vehicle’s direction. Here’s how to diagnose and install bushings and control arms.
Go through the service information
Each original equipment manufacturer (EOM) has its inspection and replacement guidelines for suspension components. While some suggest replacing bushing by measuring deflection, others recommend replacement based on depth and not the rubber components’ cracks length. Following the correct procedures indicated in the OEM guidelines eliminate the chances of unnecessary control arms and bushings replacement or replacement component damaging.
Inspect the bushings and control arms

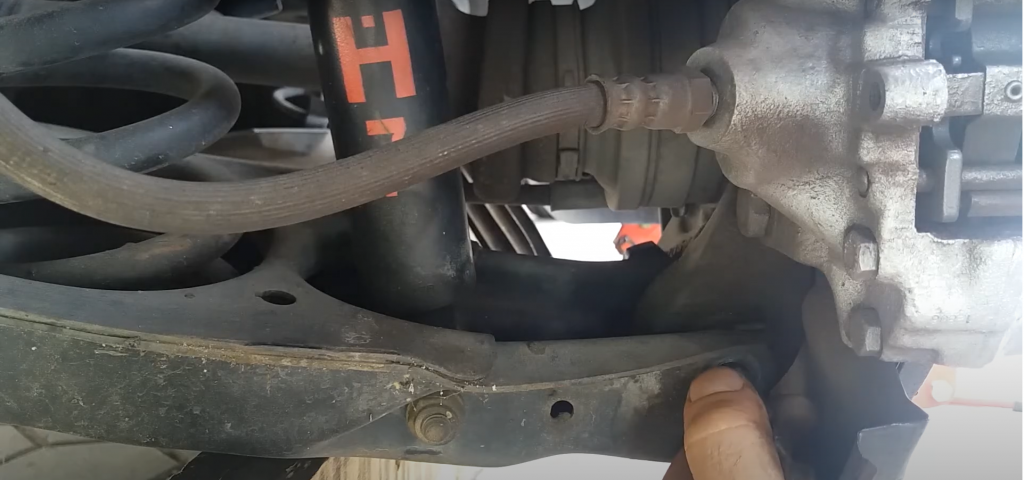
Based on the vehicle’s factory diagnosis, installation guidelines, and safety procedures, you can visually inspect the control arms and bushings. Check the control arm for distortion, cracks, and rust damage. Inspect the bushings for significant cracks and tears.
To check the bushings for play, put a pry bar on the control arm close to the bushing, then gently try moving the control arm back and forth. If you notice a significant movement from the control arm, it could signify that the bushing is worn out and needs replacement.
Check for leaking fluid
Various modern bushings and control arms are hydraulic. They control the bushing’s movement and absorb vibration by pushing fluid between chambers. If you detect a leak, replace the control arm or bushing.
Know the cause of failure
Rubber bushing mostly fails due to extreme heat exposure or fluids from transmission/ engine. If the issue isn’t addressed, the new bushing may fail before you know it.
Installing the bushing
Many aluminum knuckles and control arms can be damaged without using the proper tightening method. Most fasteners are torque-to-yield and are meant to stretch once installed, so they don’t lose their clamping force in the long run. Some fasteners are designed to be used once then discarded. Consider checking the specification and using a torque angle gauge. Avoid over-torquing the ball joint stud because that may break it and lead to potential knuckle damage.
Before torquing, lubricate the bolt thread and the housing, freeze the bushing for easy installation, and inspect the ball joints to ensure they’re in good condition. Using vice grips or a wrench, tightly hold one of the nuts, then torque the other. While the socket pushes the bushing, the other socket acts as a brace and presses up against the bushing, pressing into the housing. The bushing finally enters the housing, all without a press. You may use OE bushings made of rubber for a comfortable driving experience or aftermarket performance bushings made of polyurethane for increased handling precision and a firmer ride.
Installing the control arms
Control arms are installed on the rear and front axle. While the control arm installation process differs depending on the manufacturer, the difference may not be significant. To install the control arm, lift the vehicle and use rust solvent to treat the fixing nuts and screws. Loosen and remove the fixing screws and use a suitable tool to loosen the ball joint. Remove the old control arm. Using sandpaper and a brake cleaner, clean the ball joint pin’s mounting flange on the steering knuckle to prevent rust particles from entering the control arm.
Using the torque indicated by the vehicle’s manufacturer, install the new control arm and tighten the fixing screws. Once installation is done, align the steering. If you’re installing the control arm yourself, read the manufacturer’s information to avoid your vehicle’s damage or personal injury. Consider applying an excellent penetrating oil if you encounter seized or rusted parts.
Install cam bolts and alignment kits
When installing a new control arm or bushing, check if the vehicle already has an alignment kit. This helps save labor when the car is aligned.
Endnote
Like most parts, control arms and bushings wear out due to harsh driving conditions like offroading, driving aftermarket tires, and environmental factors. Use the above tips to diagnose and install bushings and control arms.


